But is good with other versions.
******************************************************************
Materials:
Alfa_Marijne.pspimage
Buste femme jewel 0574.pspimage
kleuren Marijne.jpg
Marijne_deco rand 1.pspimage
Marijne_deco rand 2.pspimage
Marijne_deco rand 3.pspimage
Marijne_Tekst.pspimage
Verloop Marijne_824.PspGradient
******************************************************************
Plugin:
no
******************************************************************
color palette
:
******************************************************************
methode
When using other tubes and colors, the mixing mode and / or layer coverage may differ
******************************************************************
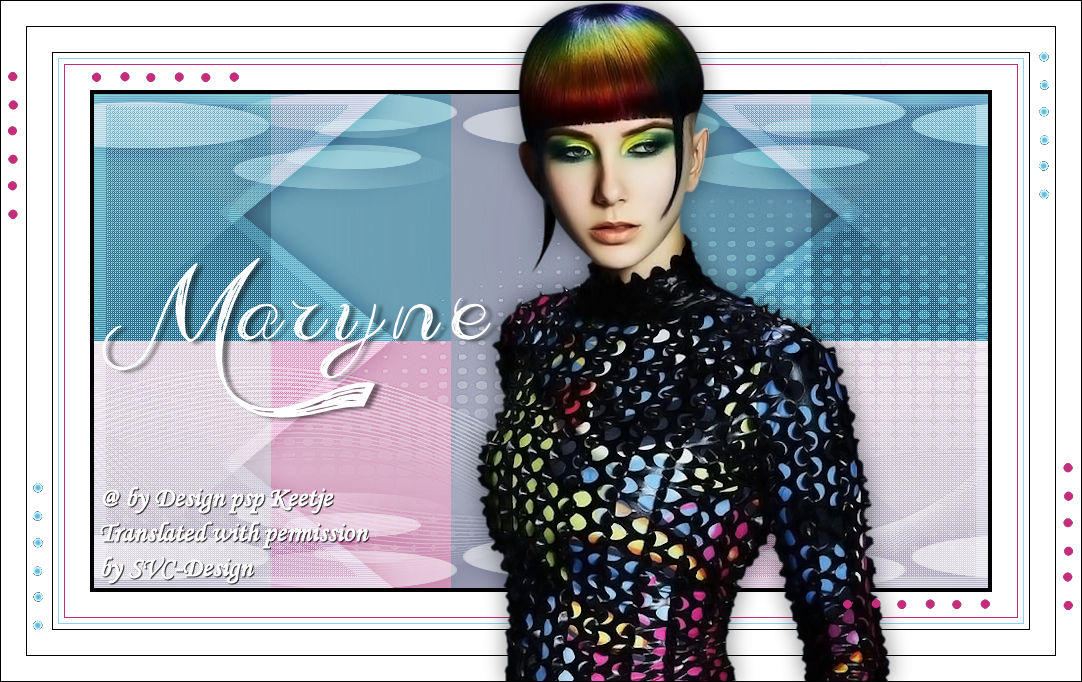
General Preparations:
First install your filters for your PSP!
Masks: Save to your mask folder in PSP, unless noted otherwise
Texture & Pattern: Save to your Texture Folder in PSP
Selections: Save to your folder Selections in PSP
Open your tubes in PSP
******************************************************************
We will start - Have fun!
Remember to save your work on a regular basis
******************************************************************
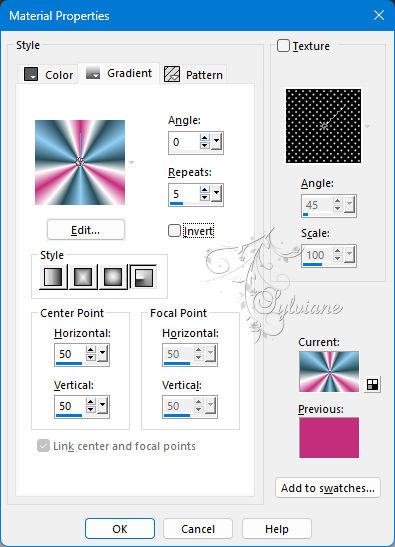
1
Note:
the gradient takes the foreground color and the background color you set
Foreground :color 1
Background :color 2
Set the foreground to the gradient Marijne_824 - Radial
2
Open Alfa_Marijne
Window - duplicate
Minimise the original - we are working on the copy
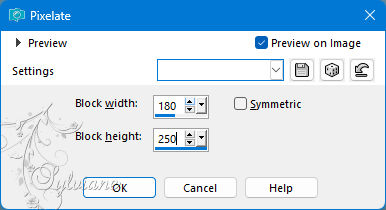
3
Fill the copy with the gradient
Effects - distortion effects - pixelate
4
Selections - Load / Save - Load selection from Alpha Channel - Selection 1
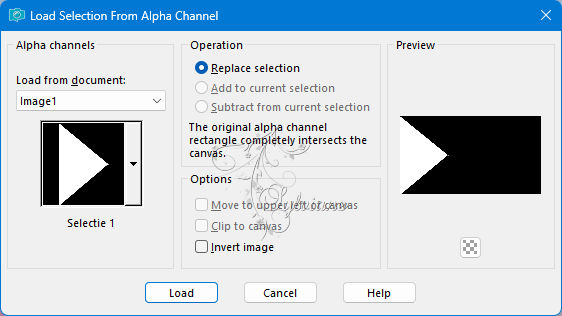
Selections – Promote selections to layer
Selection - Select None
5
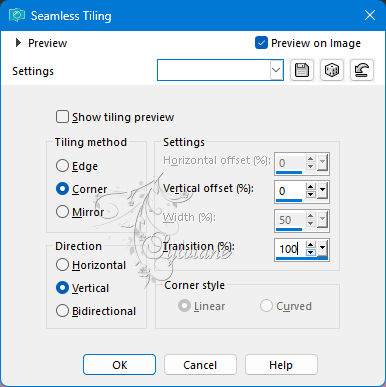
Effects - Image Effects - Seamless Tiling
6
Selections - Load / Save - Load selection from Alpha Channel - Selection 2

Selections – Promote selections to layer
Selection - Select None
7
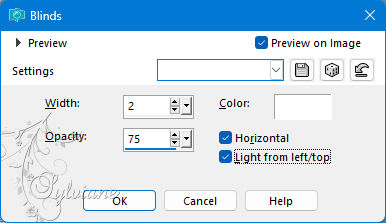
Effects - Texture Effects – Blinds -#ffffff
8
Activate Promoted Selection
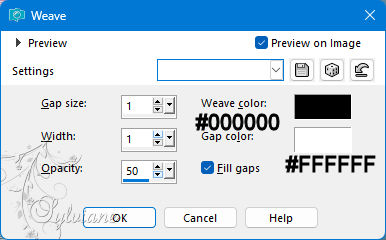
Effects - Texture Effects – wave
9
Activate the top layer
Layers - Merge - Merge down
10
Effects - 3D Effects - Drop shadow / 0 / 0 / 50 / 35 / color #000000
11
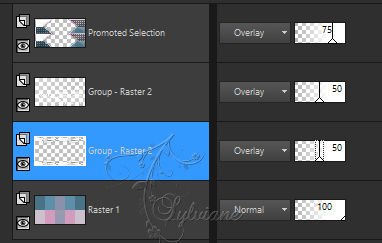
Layers - Duplicate
Image - Mirror – mirror Horizontal
Layers - Merge - Merge down
Blend mode Overlay
Opacity: 75
12
Layer palette - Activate bottom layer
Layers - New raster layer
Fill with color 4 (#ffffff)
13
layers – load/save mask – load mask from alpha channel - LF-Mask-163
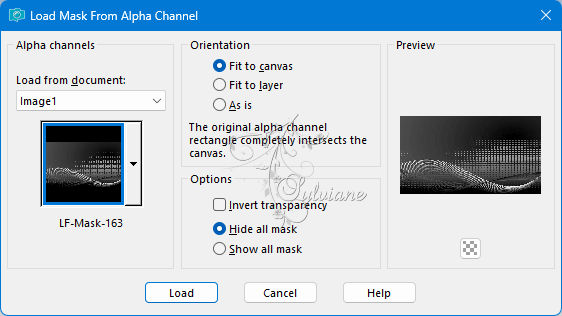
Adjust – scharpness – scharpen more
Layers - Merge - Merge group
Blend mode Overlay
Opacity :50
14
Activate bottom layer
Layers - New raster layer
Fill with color 4
15
layers – load/save mask – load mask from alpha channel - maskcameron_air3
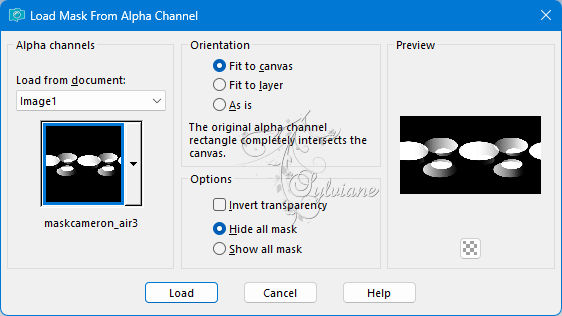
Layers - Merge - Merge group
16
Objects - Align - Top
17
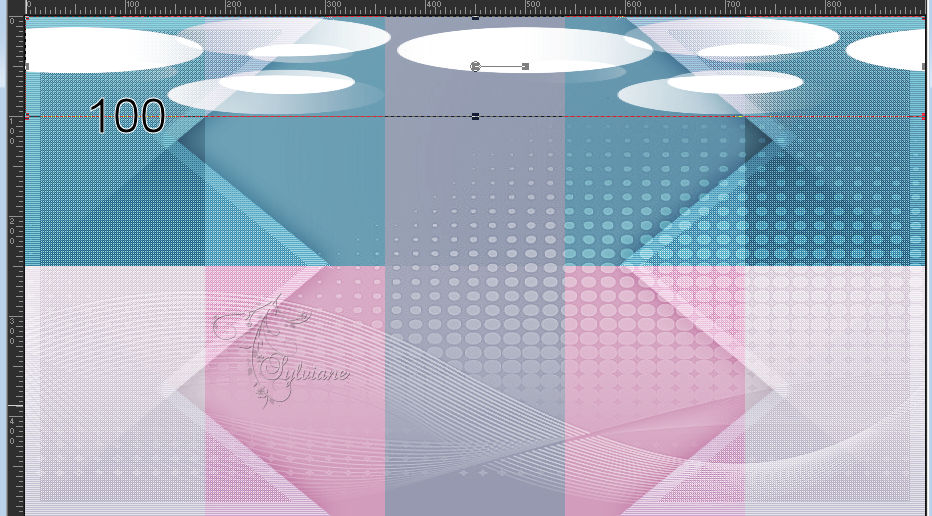
Activate selection tool (K)
before:
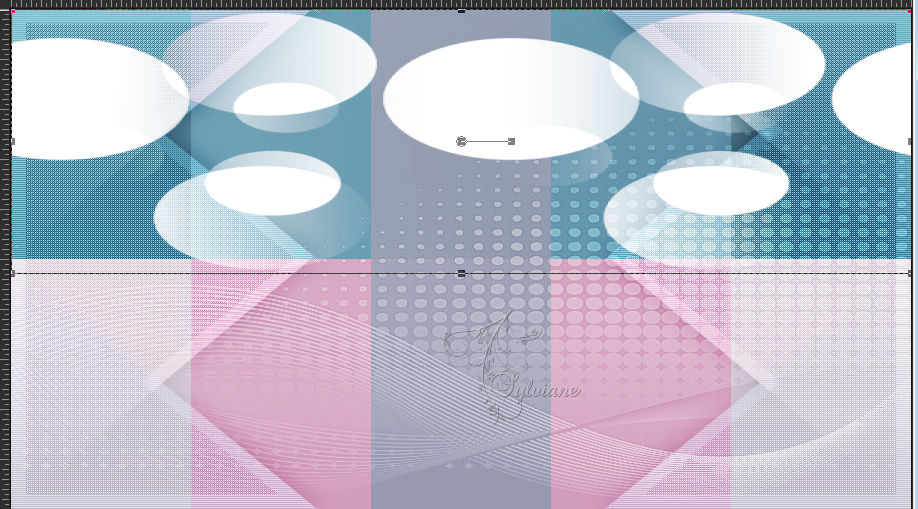
Move to the middle of the square
Move the layer up to 100 pixels
18
Effects - 3D Effects - Drop shadow / 0 / 0 / 50 / 35 / color #000000
19
Layers - Duplicate
Image - Mirror - Vertical Mirror
20
Layers - Merge - Merge down
Blend mode Overlay
Opacity: 50
21
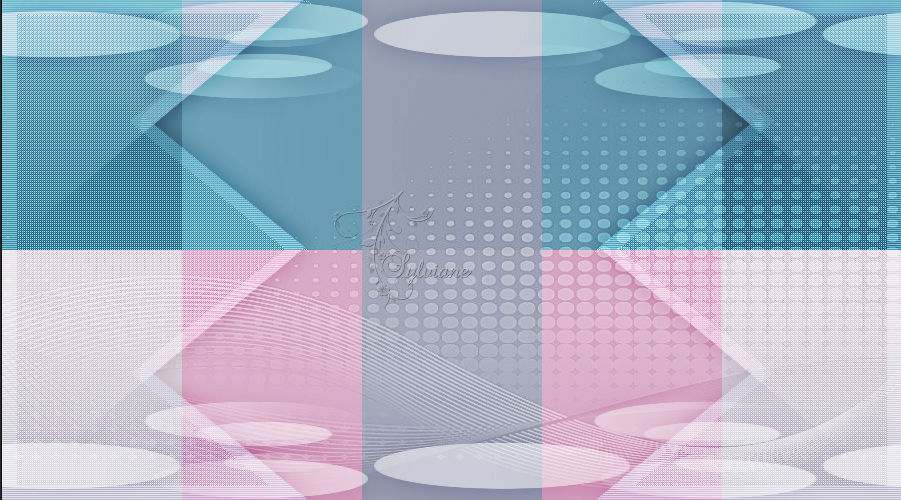
These are the layers and the work
22
Image - Add Borders – Symmetric -1 pixel - color #000000
Image - Add Borders – Symmetric -25 pixels - color #ffffff
Image - Add Borders – Symmetric -1 pixel - color1
Image - Add Borders – Symmetric -5 pixels - color #ffffffff
Image - Add Borders – Symmetric -1 pixel - color 2
Image - Add Borders – Symmetric -5 pixels - color #ffffffff
Image - Add Borders – Symmetric -1 pixel - color #000000
Image - Add Borders – Symmetric -25 pixels - color #ffffffff
Image - Add Borders – Symmetric -1 pixel - color #000000
Image - Add Borders – Symmetric -25 pixels - color #ffffffff
23
Selections - Select all
Selection - modify - contract - 93 pixels
24
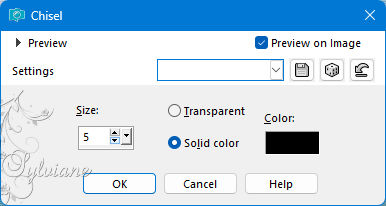
Effects – 3D effects – chisel - #000000
Selection - Select None
25
You can color it to your own color
Open Marijne_deco rand 1.pspimage
Edit – Copy
Edit - Paste as new layer
looks good
Open Marijne_deco rand 2.pspimage
Edit – Copy
Edit - Paste as new layer
looks good
Open Marijne_deco rand 3.pspimage
Edit – Copy
Edit - Paste as new layer
looks good
26
Open Buste femme jewel 0574.pspimage
Remove the watermark
Edit – Copy
Edit - Paste as new layer
Image - Mirror – mirror Horizontal
Layers – arrange – move down (3x)
place as in the example
Effects - 3D Effects - Drop shadow of your choice
27
Open Marijne_Tekst.pspimage
Edit – Copy
Edit - Paste as new layer
Place of your choice
Effects - 3D Effects - Drop shadow / 2 / 6 / 50 / 5 / color #000000
28
Place your Name/Watermark
Image - Add Borders – Symmetric -1 pixel - color #000000
Image - Resize - Change the width to 1000 pixels
Save as Jpeg
Back
Copyright Translation 2024 by SvC-Design
------------------------------------------------------------------------------
Thanks to all who created